Healthy Snacks: Kale Chips

The first time we had kale chips was during a trip to San Francisco a few years back, and we’ve been hooked ever since! There are delicious store-bought ones (Solar Raw Food makes amazing Better than Cheddar kale chips covered with bell peppers and cashews that taste just like cheese!), but they’re usually pretty pricey. Homemade kale chips are a lot less expensive and really easy!

Kale Chips

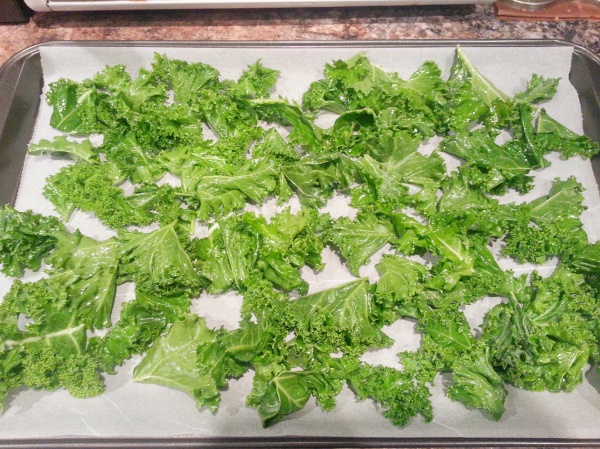
Before: Ready to Bake

Kale Chips

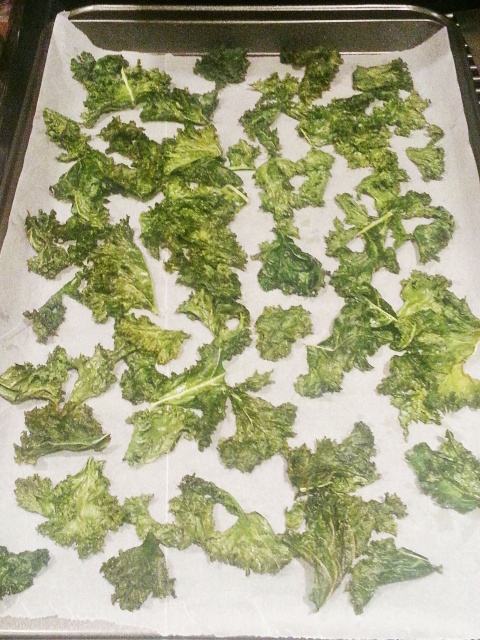
After: Kale Chips! 

Ingredients

  • A bunch of kale
  • 2 tbsp of olive oil
  • Salt or other seasoning to taste

Directions

  • Cut or rip the kale leaves off the stems, then tear the leaves into smaller bite-sized pieces
  • Wash the leaves and dry thoroughly
  • Once dry, put all the leaves into a bowl and toss with olive oil and salt
  • Spread evenly on a baking try lined with parchment paper, foil, or baking sheet
  • Bake in the oven for 20 minutes at 300°F

Tips 💡

  • Make sure the leaves are completely dry! Any moisture will make the kale soggy. In addition to air drying the kale, we used a salad spinner and paper towels.
  • You don’t have to tear the leaves into bite-sized pieces, but it makes it easier for the kale to crisp in the oven.
  • Try not to stack/layer any leaves on top of each other while baking because it’ll prevent them from crisping.
  • Some people suggest adding salt after the kale is baked (salt draws out the moisture from the leaves and can make them soggy).

Easy Smoothies: Mint + Watermelon + Frozen Banana

When it comes to smoothies, the options are endless! I was apprehensive about the watermelon-banana combo, but it turned out to be delish 🙂

Blend!Sunday Smoothies!

Ingredients*

  • 1 cup of watermelon, cubed
  • 2 frozen bananas
  • Leaves from ~2 sprigs of mint
  • 1 cup of coconut water

*These are the amounts I used for our 2 smoothies, but the beauty of smoothies is that you can adjust everything to your liking!

Directions

Put all the ingredients into the blender and blend until smooth!

Easy Avocado “Gelato”

After I tried making banana “ice cream”, one of my friends N sent me a recipe for avocado “gelato” (from this Tiffany Cruikshank Yoga Facebook post), which sounded delicious and easy to make, so I had to give it a try!

I whipped some up today and loved it! I know some people aren’t keen on avocados, but if you like them, this recipe is a must try.

Avocado "Gelato"
Ingredients
  • Half an avocado*
  • 1 cup of frozen fruit (we used mangoes)
  • 1 Tbsp of honey
  • 1/4 cup of coconut water

*A lot of people laugh about seemingly useless kitchen tools, but this all-in-one avocado tool is my friend (Crate & Barrel has since started selling a fancier one)… removing the seed with a knife always came with a risk of slicing my hand open! 😛

Directions

Throw everything into the blender and blend until smooth!

A couple weeks ago, I was lamenting about my potentially wrong decision to purchase a new blender because we haven’t used it that much lately, which Matt pointed out today as I excitedly blended and tasted my frozen avocado treat (darn, he does pay attention to what I say!). I guess it was a good idea afterall! Looking forward to trying other healthy blender recipes soon 🙂

2-Ingredient Frozen Treat: Banana “Ice Cream”

I love ice cream, frozen yogurt, and other dairy-based frozen treats as much as the next person, but this dairy-free, healthier option seemed too easy not to try!

Ingredients
  • 3–4 bananas (unlike the bananas in my photo below, the riper, the better)
  • Optional: peanut butter, Nutella, cocoa powder, vanilla, honey, or other fruit
Directions
  1. Peel and slice bananas and put them into a freezer bag or container.
  2. Once the bananas are frozen, blend them in a food processor or blender.
  3. Add the optional ingredients (if desired) and blend until smooth.

Banana "Ice Cream"!

I cannot stress the importance of Step 1! I obviously wasn’t thinking and made the mistake of throwing the bananas in the freezer whole—using a knife to remove the frozen peels and spending more time blending bigger chunks of banana = unnecessary extra work!

When first blended, the frozen bananas transform into a crumble, which gradually turns into smoother chunks. You may need to stop the blender/food processor intermittently and use a spoon or spatula to scrape the mixture off the sides and to push unblended chunks closer to the blades. Eventually, though, you should achieve a creamy consistency!

As you can see, I used peanut butter, but my friend also recommended cocoa powder. I’ve read about the other optional ingredients listed above, so I’m excited to try something different next time!

The Pilates Hundred Challenge

I love browsing Flipboard, and one of my favorite categories is the Health section, which I was flipping through yesterday when I saw an article on the Pilates Hundred Challenge. Matt and I completed the 30-Day Squat Challenge earlier this summer (3,295 squats in 30 days!), so I thought, why not?

ChallengeAccepted

Today was Day 1, and I made Matt—who had already done ab exercises today, poor guy—do it with me. It was fun! The hardest part was controlling my breathing, especially during the stretch of inhales, but I suspect that it’ll get better with practice. I’m interested to see how it goes over the next 9 days, but I think this has encouraged me to look into other Pilates exercises… bring it on!

Guest Post: The 2 to 4% Rule

Today I actually also have a guest post from Matt, who has been an absolutely amazing positive influence on me in terms of new commitment to healthy living! While we’ve both taken steps to eat healthy and shed the pounds, he has really dedicated himself to exercising almost daily, and the results have been awesome! I’ll let him speak a bit about it himself:

With my wife now blogging, I might have caught a little bit of the writing bug myself.

So my wife has hypertension. When she first told me that her doctor said that her blood pressure was abnormally high, I really thought nothing of it. This is because I thought, “Hey, she’s a young gal—I’m sure this is just a blip on the radar, and it’ll go away later.” If you don’t know April, she is a worry wart at times, so I was just brushing it off as another case of her worrying over something that will go away quickly. Luckily, her doctor suggested that she go to a pharmacy another day to do another reading on her own in case her elevated blood pressure was due to her being anxious at the doctor’s office.  As you might have seen from her post, we know what happened. I was definitely worried.

Since then, we have changed the way we eat and the way we live, including more sleep, cleaner food, and exercising when we can. As you see from her posts, we have been eating better—not always cleaner, but the off days when she doesn’t post about food, it’s because we are eating our weekly “staple meals” to keep it healthy. I’m sure she will eventually post about some of the everyday meals we eat.

Being in shape for our honeymoon in Thailand

So we’ve booked our honeymoon this year, and we’re going to Asia!  While we’re there, we’re going to a wedding for one of the bridesmaids from our wedding.  It’s going to be in Phuket, Thailand, and I’m super excited to go! When we knew we were going to go for sure, I told April that I wanted to be in shape since we will be beach-bound when we in Phuket.  At first, I really wasn’t taking exercise seriously and to be honest, I wasn’t sure myself if I would be able to lose the weight. I’m not blessed with the “eat anything I want and not gain weight” gene, which is bad since I love food so much. Then one day while on Instagram, I saw a fitness post that has really given me the motivation to keep going. And now, with less than a month to go, I’m the lightest I’ve ever been since I can remember.

beforeandafter

Losing 15 lbs following the 2 to 4% Plan

HomeGym

So what’s my secret? Eat clean as much as possible, learn to portion control, get rest, and exercise. All of these are things that have been told to us all the time, but we never listen. But back to that Instagram post… If I told you that you just need 2 to 4% of the 24 hours you have each day and 3 to 5 days a week of exercise, would you do it? That’s been my motivation and what I’ve been trying to do each day, which has been working so far. The 2 to 4% I’m asking for is only half an hour to an hour of the 24 hours you have each day. I have no trainer, no gym membership. Everything I do is at home, and all I have are my running shoes and resistance tubes, so cost is not an issue. And all I’ve been doing is running 3 to 5 km, and then doing burpees, crunches, and resistance tube exercises to help work out most of my major muscles. I have been exercising this way since July 15 till now, and in 3 months, I have lost about 15 pounds—and that’s with me still drinking beer on the weekends! If you’re in a similar situation, just make the time to do the 2 to 4%, and don’t make any excuses! It really works if you willing to try.

As you can see, this has been working well for Matt, but we’re always open to hearing about new ideas, especially now that it’s getting cold and we’re not outside as much! If anyone has any other tips or stories to share, Matt and I would love to hear them!